Curing in resin crafts is one of the most important processes that helps define the end product in terms of quality. It could be resin jewellery, keychains, molds, or ornaments, but the right uv light for resin can make or ruin an undertaking. Properly set up, the material dries quickly leaving behind a smooth creamy surface on its even surface. This tutorial presents well-researched insights into the most appropriate curing tools and techniques to ensure the most productive outcome for your resin projects.
Why UV Resin Requires the Correct Light
UV resin is an artificial material that cures under ultraviolet light. Unlike two-part epoxy resin, which may take hours to cure and must be mixed before use, UV resin is ready-to-use and can be cured in a matter of minutes by bringing a matching uv cure light to bear on it. However, a light that is too weak or not of the correct wavelength will leave the resin that is soft or tacky, not a very good state of affairs.
The effective uv light on resin produces light of a wavelength that falls in the range of 365 to 405 nanometers (nm). The surface depth is reached by the wavelength and activates the photo-initiators contained in the resin and activating the curing reaction. The intensity of the light will be measured in watts; the greater the value, the quicker and faster the curing process.
The Right UV Lamp to Use on Resin
Not every uv light for resin is the same when it comes to the curing process. Most often, nail lamps are sold as being resin compatible, but unless they have the right wavelength and power, they will not work very well. When selecting a uv light for resin, you should go with what you need, like the type of projects you are making, the curing speed you require, and the size of your workspace.
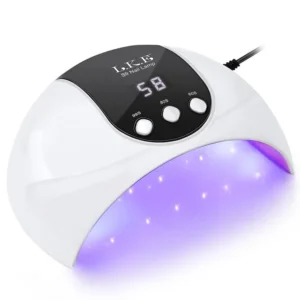
Whether you have to operate regularly on small objects such as earrings or pendants, the compact uv light for resin lamp will have a power of 36W to 48W. In bigger jobs or batch curing, the time-saving 54W or bigger lamp with a wide curing platform will work a lot easier and more efficiently. Some lamps have some enhanced features, such as motion sensors and automatic time adjustment, and some have even more of them, providing an automatic hands-off work process.
Best UV Lights to Use with Resin
Several uv light for resin models have also been effective for resin artists. The Resiners 54W UV Lamp is a good example of a proper UV lamp in the market because it is specifically made to work with resin. It provides reliability in curing and a wide platform, which means it is good for small to mid-sized projects. The other satisfactory alternative is SUNUV SUN2C 48W UV Light with its dual light wavelength and smart sensor technology.
The TOAUTO 60W Curing Station is an excellent option for high-producing professionals or anyone who is producing high amounts. It offers a uniform environment with multiple-angle UV exposure, curing resin pieces completely from all sides. For portable uses, the Commack UV Mini Flashlight will do in a pinch on small locations or small touch-up work, but is too weak to handle widespread curing.
Three of the Frequently Suggested UV Lamps by Resin Artists Are:
- The Resiners 54W UV Lamp – high efficiency and design characteristics specific to resins.
- SUNUV SUN2C 48W /220-240-W- 2-wavelength lamp with timer – a versatile lamp suitable for wide environments with a built-in timer for flexibility.
- TOAUTO 60W Curing Station – professional, high-quality batch mode.
The Errors to Prevent in the UV Lighting Utilization of Resin
Most new users find it difficult to cure even when they use the right equipment. One of the most frequent problems is applying resin in layers that are too thick. The uv light for resin is only able to penetrate a few millimeters deep. To get perfect results, it is recommended that resin be poured in layers, preferably 3-5mm thick, curing each layer individually.
The other error which is usually committed is placing the lamp at a far distance away with the project. It cures best when it is close together and so cures are better and more uniform. But bear in mind the possibility of over-curing, and you can actually yellow your work or overheat it with low-end resins, and it gets hot under the lamp. You should also always stick to the manufacturer’s guidelines for the resin and UV light of the resin to get the best results.
UV Resin or Epoxy Resin
The greatest benefit of UV resin is its speed and ease of use. It involves no mixing but rather instant curing as opposed to hours of wait time. Epoxy resin, however, is more flexible in terms of volume and is ideal for deep pours or large-scale pieces.
UV Resin Fits Better:
- Jewelry
- Charms
- Moulds less than 1cm in depth
Epoxy Resin – Is Superior:
- Large surfaces
- Deep pours
- Paintings and textured artwork needing blending
Choosing the right uv light for resin enhances convenience, precision, and overall satisfaction in creating resin art.
UV Resin Cure Step by Step
First, prepare your mould or base and pour the resin in a clean, dust-free area. Examine the layer for any bubbles and remove them using a toothpick or a mini torch. Then, place the uv light for resin on top of the layer, as close as possible without touching.
Let the layer cure for 2 to 4 minutes, depending on the wattage of your uv light for resin. When it is hard, then you proceed with layer after layer until you have a complete piece. Once the final cure has been done, sand each of its edges and also topcoat it to make it extra bright and stronger. Ventilated. What should always be observed is inspection of the final piece after cooling to check that the correct curing has taken place.
Maintenance and Safety Advice
Being arranged in a well-ventilated area, although UV resin produces fewer fumes when compared to epoxy. In the case of long-term usage, wear gloves and prevent irritation of the skin or allergic reactions, as it may happen. Prophylaxis to avoid uv light exposure in eyes: UV-blocking eyewear must be used whenever working regularly.
To the extent possible, leave your unused resin in an airtight, non-transparent container, not exposed to sunlight. Normal cleaning of your uv light on the surface of your resin lamp should be continued to avoid the collection of dust that obstructs UV rays. Taking care of your lamp and your resin will hold up through hundreds of artistic projects.
Who Needs to Use a UV Light on Resin?
As a new user of resin to develop your first charm or a small company owner trying to make custom-designed jewelry, a quality resin uv light is inevitable. It saves time, ensures the consistency of curing, and increases the product quality of what you make. Educators, crafters, Etsy store users, and professional artists will also find this level of control and speed using a uv light for resin.
Final Thoughts
You will find that your resin crafting will tremendously improve when you invest in a quality uv light for resin. It not only saves time but also does away with some of the more common curing issues and makes every piece look better at the end of it. Your lamp should provide the right wavelength and power, whether you are undertaking small-scale DIY or a large-scale production. Such a uv light to resin will ensure more pleasant, faster, and beautiful results.
FAQs
Q1. What is a good UV light to cure resins?
A: Appropriate just depends on what uv light to run because of the resin, the best light to use is 365nm to 405nm on the UV spectrum. This spectrum turns the photo-initiators in UV resin, so that the curing is effective. The best thing is to seek lamps of range 36W to 54W in small and medium light projects.
Q2: Can resin be cured using a nail UV lamp?
A: In actuality, most nail lamps are capable of curing resin as long as they are utilizing the right wavelength (365-405nm). Nevertheless, a lamp is more suitable that produces a uv light when intended as resin specific than just using any lamp.
Q3: How long does the UV light take to cure UV resin?
A: A proper uv light to be used on resin is capable of curing a layer within 2 to 4 minutes. This can range between 30 seconds and several minutes, depending on the wattage of the lamps and the thickness of the resin, and the clarity of the mould.
Q4: Why is my UV resin sticky once it is cured?
A: Most stickiness is associated with bad curing – a crappy lamp or the wrong wavelength, too far or too many coats of resin. To cure in thin layers, a powerful resin uv light is used.
Q5: Is UV resin hazard-free to use at home?
A: Absolutely. Basic precautions make uv light resin use at home safe: work with good ventilation, wear gloves, and do not look directly into the UV. It emits fewer fumes than epoxy but should still be handled carefully.
Q6: Can sunlight be used in UV resin curing?
A: It could be technically, but sunlight is highly unreliable since the strength of UV does not always stay. A special uv light is required to treat resin to get speedier and even outcomes.
Q7: How does the difference between the UV resin and the epoxy resin look?
A: UV resin takes a few minutes under the uv light when it comes to resin, whereas epoxy takes hours to set because of chemical action. UV resin: Apply to shallow projects at a high speed; use layers or deep-pour applications. Epoxy: Appropriate when your project is more significant, multi-layer, or deep-pour.